Label Images
In order to train an image recognition model, we first need to have labeled images. Image labeling requires manual human work. Human labelers have to look through the images and mark particular objects that they can see in the images. After the images are labeled we can train a model to predict such information about objects inside the images without any human help.
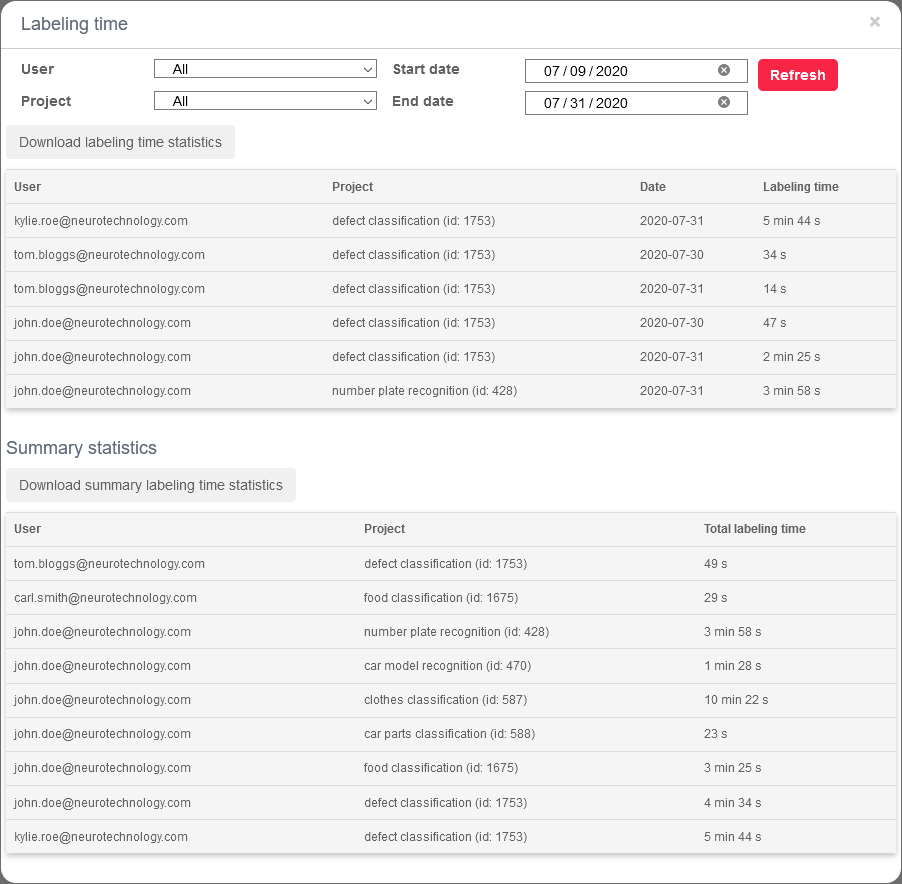
While the SentiSight.ai platform offers the ability to train your own image recognition model, you can simply use it for image labeling, too. After you are done labeling, you can download the labels as a .json file and train a machine learning model yourself. Users with paid subscriptions have the ability to share their projects with other users, manage their privileges, and track labeling time.
Image labeling tool
SentiSight.ai offers a powerful image labeling tool that you can use to draw bounding boxes, polygons, bitmaps, polylines, and points. It has a variety of functions and tools, such as our smart labeling tool, to ease the work of the labeler. For more information please refer to the image labeling tool's user guide.
Classification labeling
You can add classification labels to images either during their upload or using the image label panel.
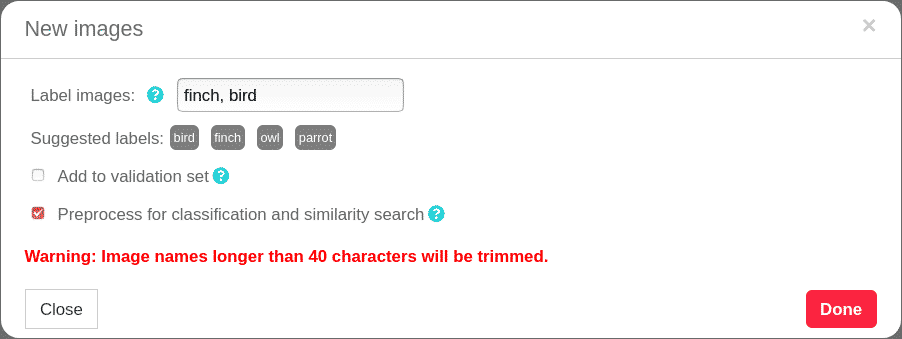
During upload, users have the ability to add classification labels to images if they are uploading individual images or a folder. After selection, users are met with a dialog in which they can write one or more comma separated labels into the label field. If a user has already created some labels, he will see them as suggestions which can be clicked to add.
During ZIP upload, users can select to add classification labels to images based on the name of the folder they are in.
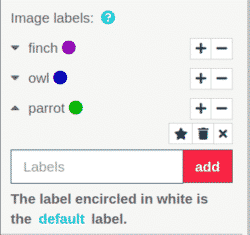
After uploading your images you can add classification labels to them using the the label panel on the left side. To create a new label, click the label field, enter your label and press add. To add the label to images, select some images and press + next to a particular label. Alternatively, you can use - to remove the label from images.
You can change the label's name by clicking on it with your mouse, entering the new name and pressing 'Enter'. You can also change the label's color by clicking on the colored circle near it and using the palette.
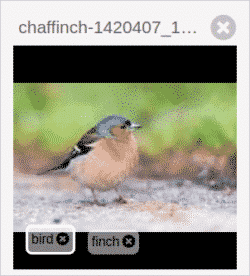
In case an image has more than one label, one of those labels is called the "default" label and it is encircled in white. This is the label that will be used if you train a single-label classification model on images with multiple labels. There are three ways to change which label is the default one:
- Clicking on the label of interest on an image with your mouse.
- Selecting some images that already have the label of interest, and labeling them again using the '+' button with the same label. The default label will change in all of those images.
- Clicking on the drop-down arrow next to the label and clicking the star icon. The default label will change in all images that have the label.
Uploading labels
If you already have image annotations that were prepared with some other tools and you want to upload them to the SentiSight.ai platform, click the Upload labels button in the left panel and choose the type of file you want to upload. Note that the file needs to have a suitable format for the platform.
Uploading image classification labels as a .CSV
The first field in each row should be the filename of the image, and the rest of the fields should be the image labels. The file extension in the first field can optionally be skipped. In case of multi-label classification, the number of fields in each row might be different, because each image might have a different number of labels. Here is an example of an annotation file for image classification as .CSV.
Uploading all image labels as a .JSON
Classification fields:
- name - image name
- mainClassificationLabel - single label that acts as the image's default label for the purpose of single-label model training
- classificationLabels - array of assigned classification labels
[
    {
        "name": "image_name.jpg",
        "mainClassificationLabel": "label1",
        "classificationLabels": [
            "label1",
            "label2"
        ]
    }
]
Bounding box fields:
- name - image name
- boundingBoxes - array of bounding boxes
- label - label of the bounding box
- occluded - whether the object is obstructed by another object
- x0, y0 - coordinates of the top left corner of the bounding box
- x1, y1 - coordinates of the bottom right corner of the bounding box
- attributes - array of attributes
- keypoints - array of keypoints
[
    {
        "name": "image_name.jpg",
        "boundingBoxes": [
            {
                "label": "boundingBox1",
                "occluded": false,
                "x0": 342,
                "y0": 359,
                "x1": 565,
                "y1": 537,
                "attributes": [
                    {
                        "name": "attribute1"
                    },
                    {
                        "name": "attribute2"
                    }
                ],
                "keypoints": [
                    {
                        "name": "keypoint1",
                        "x": 456,
                        "y": 394
                    },
                    {
                        "name": "keypoint2",
                        "x": 383,
                        "y": 499
                    }
                ]
            }
        ]
    }
]
Polygon fields:
- name - image name
- polygonGroups - array of polygon groups
- label - label of the polygon group
- occluded - whether the object is obstructed by another object
- polygons - array of polygons within the polygon group
- hole - whether the polygon is a hole within another polygon
- points - array of points of a polygon
- x, y - polygon's point coordinates
- attributes - array of attributes
- keypoints - array of keypoints
[
    {
        "name": "image_name.jpg",
        "polygonGroups": [
            {
                "label": "label1",
                "occluded": false,
                "polygons": [
                    {
                        "hole": false,
                        "points": [
                            {
                                "x": 838,
                                "y": 692
                            },
                            {
                                "x": 896,
                                "y": 542
                            },
                            {
                                "x": 1358,
                                "y": 620
                            }
                        ]
                    }
                ],
                "attributes": [
                    {
                        "name": "attribute1"
                    },
                    {
                        "name": "attribute2"
                    }
                ],
                "keypoints": [
                    {
                        "name": "keypoint1",
                        "x": 934,
                        "y": 614
                    },
                    {
                        "name": "keypoint2",
                        "x": 962,
                        "y": 584
                    }
                ]
            }
        ]
    }
]
Polyline fields:
- name - image name
- polylines - array of polylines
- label - label of a polyline
- occluded - whether the object is obstructed by another object
- points - array of points of a polyline
- x, y - point coordinates
- attributes - array of attributes
[
    {
        "name": "image_name.jpg",
        "polylines": [
            {
                "label": "label1",
                "occluded": false,
                "points": [
                    {
                        "x": 286,
                        "y": 897
                    },
                    {
                        "x": 1063,
                        "y": 949
                    }
                ],
                "attributes": []
            }
        ]
    }
]
Point fields:
- name - image name
- points - array of points
- label - label of a point
- occluded - whether the object is obstructed by another object
- x, y - coordinates of a point
- attributes - array of attributes
[
    {
        "name": "image_name.jpg",
        "points": [
            {
                "label": "label1",
                "occluded": false,
                "x": 801,
                "y": 874,
                "attributes": []
            },
            {
                "label": "label2",
                "occluded": false,
                "x": 314,
                "y": 762,
                "attributes": []
            }
        ]
    }
]
Uploading color bitmaps as a .PNG
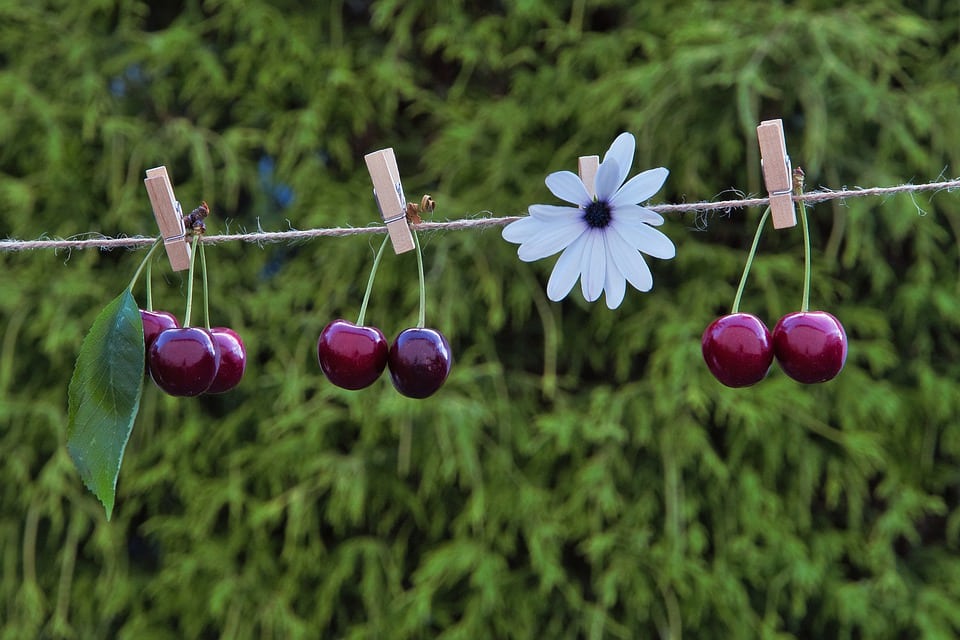
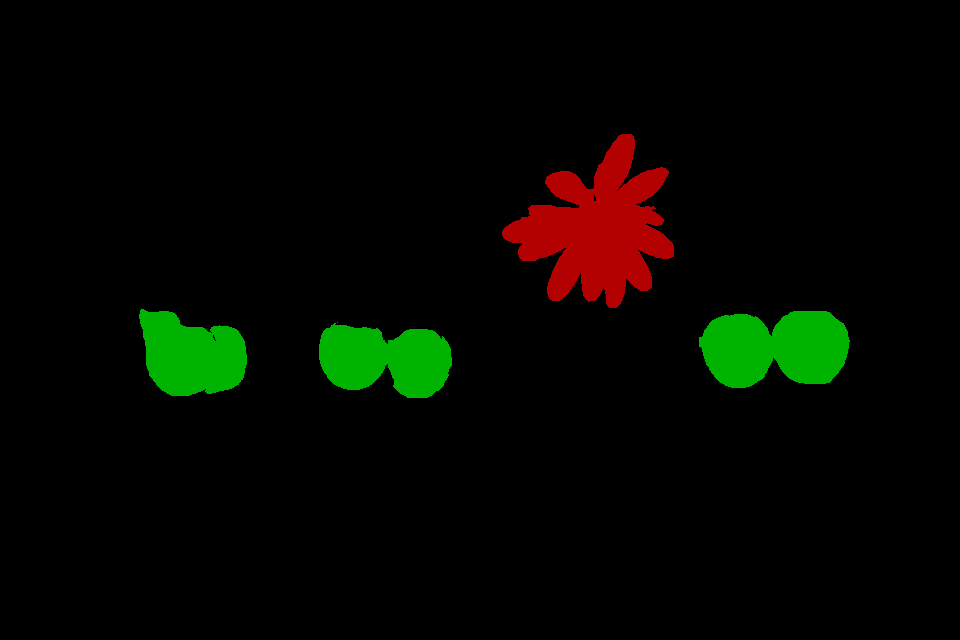
A bitmap image should have a black background with each color representing a different object. Same color pixels will be assigned to one object. See the example below:
Uploading B/W bitmaps as a .ZIP
Each bitmap image should have a black background with objects colored white. The zip should contain a folder named 'bitmaps' which has the following structure: image_name/label_name/object_bitmap.png . See this example.
Project sharing & user management
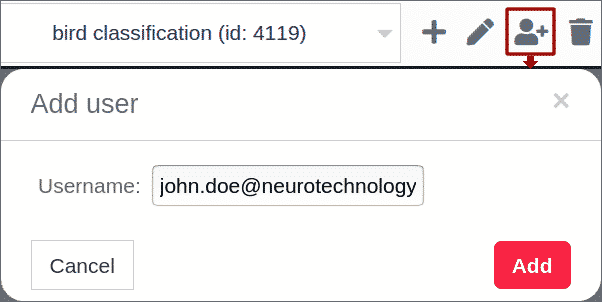

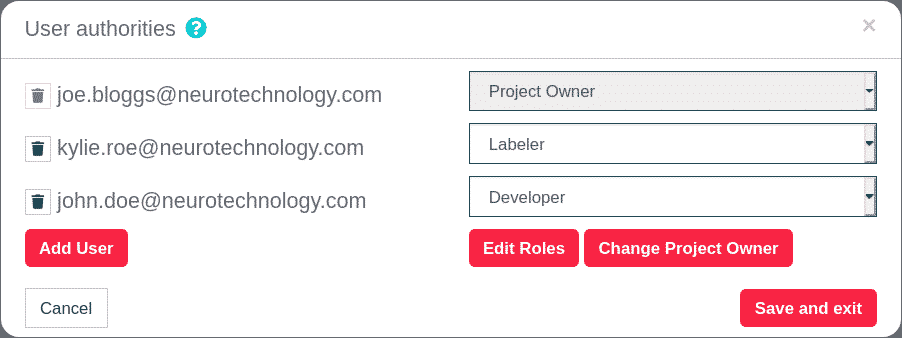
At the User permissions dialog, you have the ability to:
- Add or remove users from the project
- Change user roles
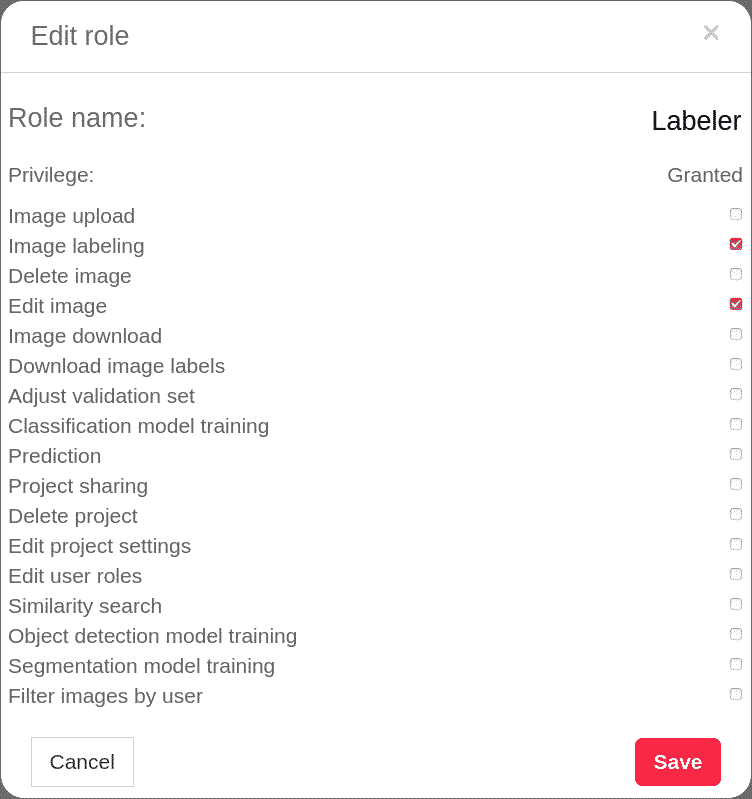
- Edit user roles (create new or delete old roles, change role privileges)
- Transfer the ownership of the project.
Filtering tools
SentiSight.ai offers three ways to filter your images:
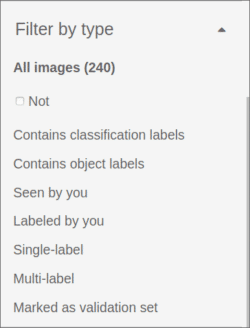
Filter by type allows the user to filter their images by various types. You can check whether or not the images:
- Contain classification labels
- Contain object labels
- Have been seen by you
- Have been labeled by you
- Have a single label
- Have multiple labels
- Are marked as part of the validation set
For example, by choosing Labeled by you and Not you can filter the images that have not been labeled yet and continue where you left off.
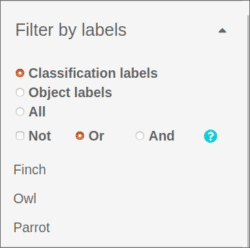
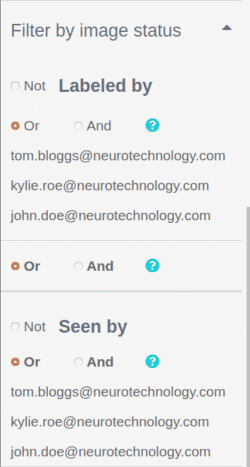
Filter by labels allows the user to filter their images based on the classification and/or object labels they have. You can use Not to filter images that do not have your selected labels and choose between Or and And logic when filtering the images. This is useful when reviewing images labeled by a particular label.